

Are you having trouble cutting through tough material? Are you looking for an efficient way to make precise cut with minimum effort?
Rip saw blades are the answer you’ve been searching for. Learn how to use them and reap their many benefits in this ultimate guide. You’ll never have to worry about any cutting job ever again!
This comprehensive guide to rip saw blades will provide you with all the information you need to make sure that you are using your rip saw blade properly and safely. It will cover the material of the blade, the size of the teeth, the grind angle and other important points. Understanding how each of these characteristics makes a difference in your results will help ensure maximum performance from your tool.
We’ll discuss types of saw blades for wood, laminate and metal materials, as well as other considerations such as safety and maintenance. After reading through this guide, you should have a much better understanding of which type and size rip saw blade is right for you.
Choosing the Right Rip Saw Blade
Choosing the right rip saw blade for the job is an important step in successful woodworking. There are several different types of rip saw blades available and each has its own uses. The following information will help you make the best decision for your project.
Rip saws come in two basic types; standard and alternate top bevel (ATB). Standard rip blades feature a flat top tooth design, while ATB rips have alternating sharp teeth that alternate between one flat and one pointed on each side. Standard blades produce a slightly rougher cut, but they will work on both hard and soft woods; this type is generally used for general-purpose ripping applications like crosscutting or ripping plywood or 2x4s.
Alternate top bevel blades are usually recommended for use on hardwoods, as their design creates a finer finish than standard rip blades. However, these blades can also be used to cut softer woods; they just may require more than one pass with deeper cut heights to get a satisfactory finish. Additionally, ATB rip saws can produce smooth crosscuts in hardwoods with good results, though it is important to note the blade must travel along straight lines when cutting across grain patterns to ensure clean cuts without tear out.

Blade Size
Saw blades are typically measured in inches and milli meters, although professional contractors may use other units of measurement. Blade size is determined by the diameter of the blade and is typically available from four to sixteen inches.
Most rip saw blades have a larger diameter than other types of blades because they must fit the distance between the saw’s housing and guard. Choosing the right size blade is crucial to ensuring that you can make accurate cuts without damaging your work surface or yourself.
If you frequently switch between rip and crosscut operations, it may be beneficial to purchase multiple sizes so that you do not have to readjust your saw every time you switch tasks.
Tooth Count
When selecting a rip saw blade, the number of teeth per inch should be a major determining factor. In general, blades with fewer teeth will provide faster cuts though the resulting piece will have a rougher edge. Blades with more teeth produce a cleaner cut and are best for finer professional work.
In general, ripping blades are categorized into three distinct categories based on tooth count:
– Low tooth count blades tend to be most versatile as they can be used for both ripping and crosscutting operations. They can handle quick and rough cuts in rough lumber while also providing a clean cut in softer woods like pine or cedar. These blades typically have 8-20 teeth per inch (TPI).
– Medium tooth count blades generally range from 10-18 TPI and are used mainly for ripping operations in soft to medium hardwoods like maple or cherry. The lower number of teeth permits cutting at higher feed rates than other blades with more teeth and produce smoother surfaces when compared to low TPIA ?T ripsaw blades.
– High tooth count ripsaw blades range from 16-24 TPI and are intended for precision jobs that require finely crafted edges on wood materials such as hardwoods, plywood, particleboard, or veneer plywood. An added advantage of these types of saws is that they are substantially quieter when compared to their lower TPI counterparts.
Maintenance and Care of Rip Saw Blades
Ensuring that your rip saw blade is kept in good condition is essential to extending its life and getting the most for your investment. To properly maintain and care for a rip saw blade, there are a few steps to follow.
Before Use: It’s important to inspect the saw blade carefully before use, ensuring that there are no signs of damage like bent teeth, cracked welds or corrosion. If any damage has been found, have it serviced immediately before using it. Inspect the tension of the blade as well; if it feels too loose or too tight, adjust accordingly.
During Use: Follow manufacturer guidelines when using your blades; never force materials through the saw if they don’t fit securely or cut deeper than necessary as this will increase wear on the blade teeth. Never force feed upside down when cutting softwood – feed in a controlled manner using full thicknesses at a time and always remember to let the width of material determine how deep you should cut! Invest in good shop dust collectors and use them to reduce wear on blades from fine dust particles.
After Use: Clean the blade with soapy water immediately after each use and allow it to dry thoroughly after cleaning to prevent further damage from corrosion. Store rip saw blade sin cool, dry areas such as basements or bottom shelves of storage cabinets (not exposed to direct sunlight as heat can weaken metals). When storing away for long periods of time, lightly coat the strands with vegetable oil or cold-rolled machinist’s oil so as not to attract dirt which may interfere with the functioning of the blade teeth later on.
Cleaning the Blade
Before attempting any repairs on your rip saw blade, it is important to ensure that it is safely and thoroughly cleaned. Cleaning a saw blade will help you get the most out of your purchase and prevent the blade from becoming damaged or inefficient due to wear and tear.
The right method of cleaning depends on how often you use the saw blade and how high-quality it is. Generally speaking, it’s a good idea to clean after each use with warm soapy water or a mild detergent, as well as a soft brush or cloth. It’s important to be gentle when cleaning the blade so that you don’t damage its delicate surfaces or cause corrosion over time.
Be sure to rinse off any soap residue after washing with clean water, and make sure all parts of the saw have been adequately dried before reassembling. If necessary, you can also oil components such as moving hinges after cleaning for added lubrication and smooth operation in between uses.
Sharpening the Blade
Once the decision has been made to sharpen the rip saw blade—and do not be duped into believing that you can use a mill file or grinding wheel to do this quickly—the tool must be securely held in its position before you begin. You can use either a vice, preferably mounted on a sturdy surface, or a rip saw blade holder designed to hold the blade while sharpening. It is important that when using a vice, the workpiece must be securely clamped with the teeth of the rip saw facing up. There are also specialist stones and jigs available if you require them to sharpen your blades.
Using an oilstone or water stone, hold it at an angle of fifteen degrees from perpendicular. Start from one corner of each tooth and moving outwards, gently slide it back and forth along every tooth edge for about sixteen strokes per side (thirty-two combined). Once complete, it’s okay to add some small honing strokes. Make sure that each stroke is full and consistent across both sides always maintaining the same angle of fifteen degrees from perpendicular so as to prevent over-sharpening any part of the blade.
Once all teeth have been sharpened in this way then either use a mill file or fine oilstone/waterstone on one edge of each tooth by carefully positioning your hand with precision and dragging it along each serration touchingly lightly along its length (it is under no circumstances recommended that you receive assistance here due to potential injury). This should only take two or three strokes per tooth edge for completion when done correctly; anything more risks either weakening it too much or creating an incorrect pitch for smoothly cutting through wood effectively upon installation into its housing unit afterwards.
Then inspect closely for any burrs that may have formed along with any signs of metal fatigue as these will reduce accuracy when used later on; eliminating them quickly can further prolong its useful lifespan with additional years’ worth of serviceable performance still left within it ready waiting after overall precautionary maintenance completion beforehand goes without saying sensibly here in finishing this section off too underlined nicely too!
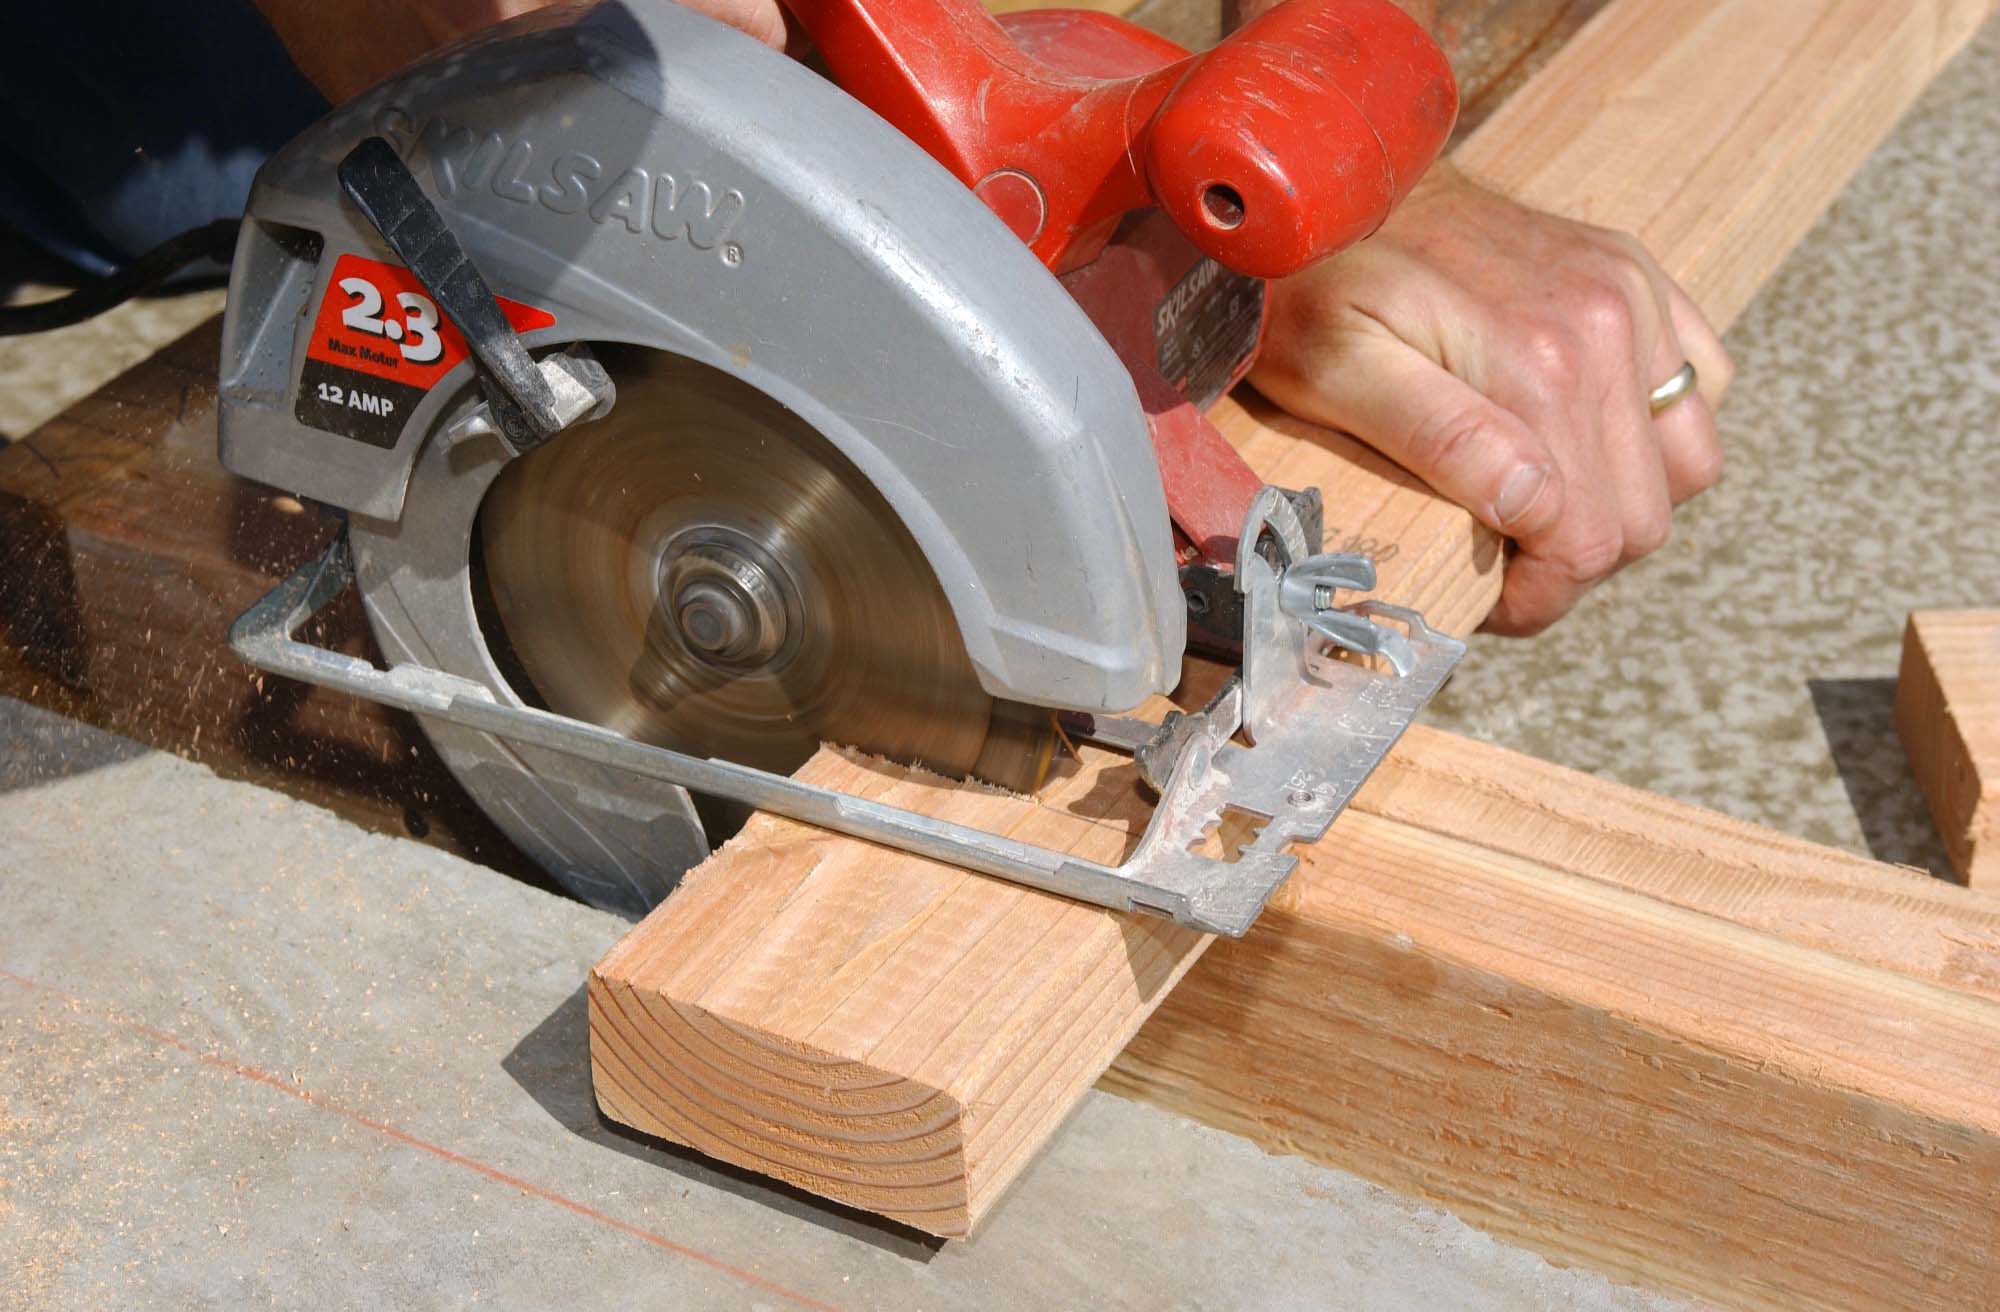
How to Use a Rip Saw Blade
When installed correctly, a rip saw blade will quickly and accurately cut through softwoods and hardwoods. Understanding the safest way to use a rip saw blade is important for any working with saws, as incorrect use can lead to poor result and even injury.
First, familiarize yourself with the anatomy of the saw. A typical circular saw includes an arbor that holds the blade in place,a shaft or spindle on which the arbor turns, and bearings that support the shaft. Additionally, most saws come equipped with guards to protect your hands from coming in contact with the blade while operating it.
To use a rip saw blade safely and change blades properly:
- Make sure you have identified proper safety gear. Goggles or protective eye wear should always be worn when using any power tools like a circular saw and ensure no other personnel are in close proximity while operating it.
- Unplug your circular saw before attempting any repairs or changing blades . This will prevent any electric shock injuries caused by accidental contact with exposed wiring caused by changing blades .
- Remove screw holding anti-kickback pawls (small L-shaped protruding parts) if present first , then loosen screws for the arbor (or collar) to release tension on old cutting edge of ripping blade – typically categorized by size such as 10” or 12” or 10mm etc..
- Pull upward very carefully on one side of old cutting edge of ripping blade so that mounting holes are separated slightly from keyways in arbor (or collar) then slide new cutting edge into slots in Hub/arbor (or collar). Only force needed is enough to insert new sharp steel tooth surface all way into slots followed by opposite flat side for centered consistent running groove equal thickness over entire distance all way across table surface , such as 1/8” etc,.
- Push firmly downward onto both sides around entire circumference until two outer mounting holes aligns exactly into two separate keyways found at each end of arbor hole followed just spinning handle clockwise few Turns until mounted securely onto resting position against washer/spacer being held a few mm away from shoulder portion directly behind it additionally separating by plastic washer next outside */inside touching steel face teeth All Way Around According To Aimed Cut …..Do Not Force Through Power …Just Hand Spin!
Setting Up the Saw
In order to prepare your saw for use, you need to assemble the machine, mount the blade and set the necessary adjustments. Depending on what kind of saw you are using, setting up your saw can vary. Most machines that use rip saw blades have an adjustable rip fence which needs to be moved in order to accommodate whatever size material you are cutting.
Next, use the take-up screws that hold each side of the rip fence in place and steady guide it along a parallel track. Once secured in place, check to make sure that it is square before powering up your saw machine.
A general rule of thumb is to ensure that you have a minimum of 1/32-inch clearance between any part of the blade and the rip fence when making a cut. Finally, once everything has been checked and is ready for operation then turn on your saw machine and adjust its depth according to whatever size material is being cut so as not create any unnecessary friction or debris buildup from too much force applied when cutting with rip saw blades.
Positioning the Blade
- Positioning the Blade: When using a rip saw to cut wood, it is important to ensure that the blade is properly positioned in order to produce a straight cut or cut of desired width. A rip saw blade is usually made of steel, and its characteristics determine its suitability for different cutting jobs. The basic steps for positioning the blade are as follows:
- Place the blade perpendicular to the material being cut and retract it until only a small portion of the tip sticks out from the back edge of the material.
- Reposition the saw so that only half of its teeth are exposed, with one half positioned above and one half positioned below your work piece’s surface. This ensures greater stability when cutting longer pieces.
- Adjust cutting angles accordingly depending on whether you’re making a crosscut (90 degrees) or a rip cut (45 degrees).
- Make sure that your grip on the handle is secure before starting to make any cuts, as this will maximize control over both direction and rate of speed during cutting.
Troubleshooting Common Problems
Troubleshooting is a key part of saw blade use, as blades can become damaged, warpped or simply wear out over time. It’s essential for operators to be able to identify and fix common hand saw issues or when necessary replace the blade in a timely manner.
Here are some common problems to look out for and how to rectify them if noticed:
– Dull Blade – To sharpen the blade you’ll need either a pocket sharpener with diamond abrasive built-in, a whetstone or pencil sharpener.
– Warped Blade – Use vice clamps to secure the saw in place and then try operating the hand saw again, if there is still an issue then you should check tension on the blade using an accurate torque wrench and adjust accordingly.
– Bent Blade – First you must straighten out the teeth using pliers or flat nosed punches, alternatively if severe enough damage has been done then you’ll need to replace the blade.
– Noisy Hand Saw – Lubricate bearings making sure to keep all parts tight together but not so tight it disrupts cutting accuracy. If issues still persist it may be that your blade does not fit properly into its respective slot on the leg of your saw table in which case realignment will be needed.
By troubleshooting common problems such as these you can help ensure that your rip saw always performs at maximum efficiency and minimise any disruption to production times due to unnecessary delays caused by malfunctioning blades.
Burning or Smoking
Burning or smoking is typically caused by excessive heat which transfers from the saw blade to the material being cut. The excessive heat is caused by too much downward pressure being put on the saw blade, causing it to rub against the material and creating friction in return.
To prevent this, use a light cutting action when you’re cutting materials with your rip saw blade. As you feed the material through, make sure that you are lifting up slightly between cuts. This will help to prevent sparking and smoking caused by too much friction and will increase the life of your blades as well.
Additionally, be sure to keep an eye on how hot your blades are getting after prolonged use as you may need to give them a break and let them cool down before continuing.
Uneven Cuts
When sawing a large piece of material with a rip saw, you may find that the cut is slightly uneven and requires finishing strokes to make it smooth. This is the result of the blade being worn or defective. That’s why it’s always important to check for blade wear and tear every time before you start cutting. At least every two uses of your rip saw blade, you should sharpen it or replace it with a new one for cutting accuracy.
To prevent uneven cuts, users should take precautionary measures such as ensuring proper tracking on their machines, checking for squareness between fence and blade and setting the right chip loads during operation. Chip load refers to how much material is removed by each tooth in each revolution of the blade, meaning if this setting is too large or too small, it can cause an uneven cut along the lumber edges.
It’s also important to be aware of potential binding which can occur while crosscutting thick lumber or when making deep cuts on wide boards. In these cases, having a sharp and properly tensioned rip saw will ensure nothing binds up and causes inaccuracies in your cuts. Finally, make sure that you’re using appropriate feed speeds – not going too slow (causing burning) or too fast (which can lead to kickbacks). By following these measures when using your rip saws, users can be sure to achieve precision cuts with each operation!

Conclusion
Essentially, rip saw blades are designed to cut with the grain of the wood, providing efficient, precise cuts for your project. Whether for jointing or ripping hardwood or softwood, there is a rip saw blade available to get your job done effectively.
While selecting a blade may seem intimidating at first, with the right information on tooth geometry and performance classifications, you can make an informed decision and choose an excellent rip saw blade tailored to your individual needs.
Thanks to this guide you now know that when selecting a saw blade you need to consider several factors like blade type, plate material and size before making a selection. This guide also provided an overview of different types of saw blades such as regular-tooth blades and alternate-top bevel blades as well as construction materials like carbide-tipped steel and tricobalt steel alloys blades. Finally, we discussed about adjusting the setting for cutting depth based on project needs and types of materials in order to properly use a rip saw blade.
FAQ’s
What are the different types of saw blades and their uses?
There are various types of saw blades available for different applications such as rip, crosscut, combination, miter, dado, and specialty blades. Rip blades are used for cutting along the wood grain, while crosscut blades are used for cutting across the wood grain. Combination blades are versatile and can be used for both types of cuts. Miter blades are used for making angled cuts, dado blades for cutting grooves, and specialty blades for specific materials like metal or concrete.
How do you use a rip saw?
A rip saw is used for making cuts along the wood grain. To use a rip saw, mark the wood where the cut is to be made and place it securely on a workbench or sawhorse. Grip the saw handle firmly with one hand and use the other hand to guide the blade along the marked line. Apply steady pressure while sawing in a straight line, letting the saw do the work.
How do saw blades work?
Saw blades work by using teeth to cut through materials such as wood, metal, or plastic. The teeth are designed to remove material in small chips or pieces as the blade rotates. The shape and spacing of the teeth determine the type of cut the blade can make, such as a rip cut or crosscut. Saw blades can be powered by hand or by a motor, such as in a circular saw or table saw.
What are the 3 types of blades?
The three types of blades are toothed blades, abrasive blades, and diamond blades. Toothed blades are used for cutting through materials such as wood, metal, and plastic. Abrasive blades are used for cutting through harder materials such as concrete or stone, while diamond blades are used for cutting through very hard materials such as glass or tile.
What are the four types of blades?
The four types of blades are straight blades, curved blades, serrated blades, and jagged blades. Straight blades are used for making straight cuts, while curved blades are used for making curved cuts. Serrated blades have teeth that grip and cut materials such as bread or meat, while jagged blades have teeth that cut through tough materials such as bone.
What is the best saw blade for rip cuts?
The best saw blade for rip cuts is a rip blade. Rip blades have fewer teeth per inch than crosscut blades, which allows them to remove material more quickly and efficiently along the wood grain.
What is the strongest type of saw blade?
The strongest type of saw blade is a diamond blade. Diamond blades are made with industrial diamonds and are able to cut through the toughest materials, such as concrete or stone.
How many types of blades are there?
There are many types of blades, ranging from toothed blades for cutting through materials like wood and metal to specialty blades for specific applications. The exact number of types of blades depends on how broadly or narrowly the term is defined.
What are two 2 different types of blades for a table saw?
Two different types of blades for a table saw are rip blades and crosscut blades. Rip blades are designed for making cuts along the wood grain, while crosscut blades are designed for making cuts across the wood grain.
What are 5 different types of saws?
Five different types of saws are circular saws, reciprocating saws, jigsaws, band saws, and miter saws. Circular saws use a toothed blade to make straight cuts, while reciprocating saws use a blade that moves back and forth to cut through materials. Jigsaws are handheld saws used for making curved cuts, while band saws are stationary saws used for cutting thicker materials. Miter
See Also:
- Best saw blade
- Best ripping blade for table saw
- Best rip saw blade
- Best pruning blade for reciprocating saw
- Best pole saw blade