

Do you need to cut some tile with a 7 inch wet tile saw blade? If so, you’re in luck! This guide will provide you with all the information and tips needed to successfully complete this task.
Whether you’re a professional contractor or just a DIY enthusiast, learning how to cut tile can be daunting—but we’ll make it easy! Read on to learn all the important details about working with a wet tile saw blade.
Whether you’re a professional installer or someone who has chosen to do it yourself, knowing how to accurately cut tiles with a 7-inch wet tile saw blade can be a great asset. A wet tile saw is designed for cutting ceramic, stone and porcelain tiles in a precise manner. It allows you to make twist cuts, square cuts, miters, or other types of cuts without wasting the material or creating an uneven edge.
This guide provides detailed instructions on safely cutting tile with a 7 inch wet tile saw blade. It covers topics such as preparation of the work area, setting up the saw blade, and proper cutting techniques that will help guarantee precise results every time.
By following these basic steps and using appropriate safety gear as outlined in this guide, you can create beautiful results that even a professional would be proud of!
Preparing for the job
To ensure a successful tile-cutting job, there are several steps that should be taken prior to beginning the project. Properly preparing the space and gathering all necessary tools and materials is essential to success.
The first step should be removing any excess items from the workspace. It is recommended that you cover any furniture or other items in the area with plastic sheeting or old sheets to protect them from dust and debris. Next, marking the tiles with a carpenter’s pencil will make cut lines visible as well as allow alignment guides to be made with a straight edge later on. It is important to measure twice and cut once when determining where your cuts will go in order to avoid costly mistakes.
Before installing the tile wet saw blade, make sure to use lubricant on both sides of the blade for smooth cuts; this increases cutting speed and accuracy while also prolonging blade life. Additionally, having a shop vacuum handy will help collect water that may be scattered from cutting thicker tiles as you work. Finally, measuring twice allows for easier adjustments between levels if needed during mid-cut adjustments; this also prevents either an over-cut or undersized cut which would ruin two pieces instead of just one!

Safety precautions
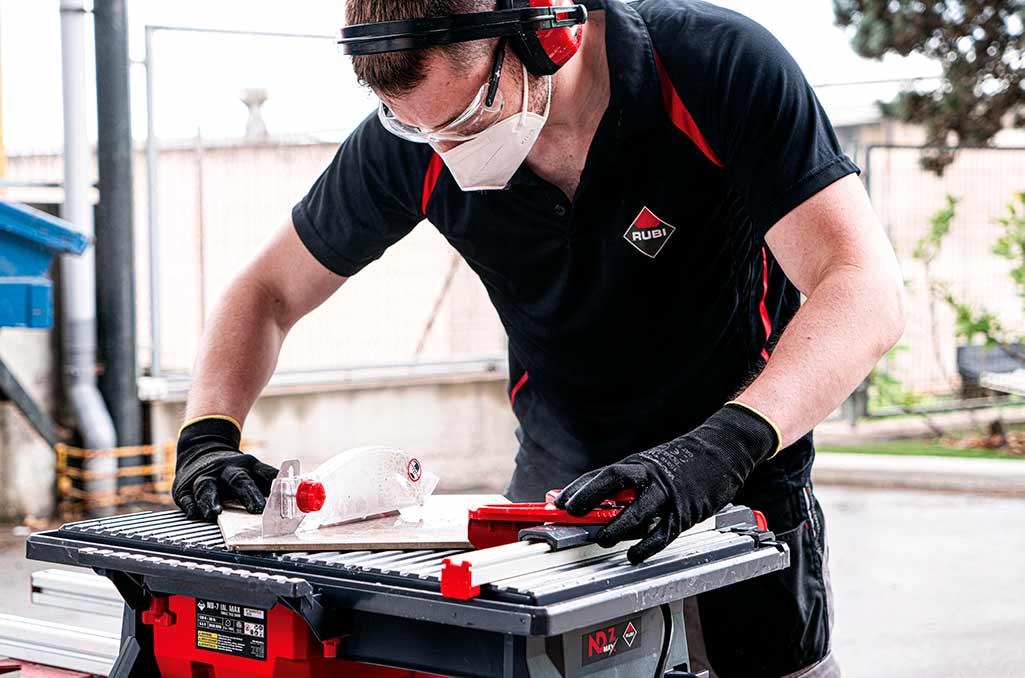
It is important to take adequate safety precautions when working with a 7 inch wet tile saw blade. Use protective gloves and safety glasses for protection from flying particles and wear a face mask to avoid inhaling dust. Be sure to switch off the saw before changing the blade, and inspect the blade for any signs of wear or damage before use.
Make sure you are steady on your feet at all times when operating the saw, as slippery or wet surfaces can be hazardous. When cutting through many tiles you may need to push down on the tile while cutting which requires two hands – in this case use block grips clothing to slow down speed of spinning of tiles which reduces risk of injury.
It is always advisable to make multiple passes instead of forcing one deep pass through – this will provide better control over cuts, reduce the risk of damaging either surface you are cutting, reduce fatigue and make it easier to achieve an even result.
Gathering necessary tools and materials
Before beginning any tile installation project, it is important to gather the necessary tools and materials. For a 7in wet tile saw blade, some of the necessary tools and materials include: a diamond hole saw, a jig saw with a carbide-tipped blade, wet/dry vacuum cleaner, electric drill with variable speed control, dry-lay flat format porcelain or ceramic tiles in 1/2 in. or 3/4 in. thicknesses, talc or mastic as an adhesive for the tiles to the wall or floor surface and grout.
Making sure you have all the right items up front will save you time later and ensure your cutting application goes smoothly.
Setting up the saw
Before setting up your saw, make sure you have the right tools. You will need a power source (electric or gas), at least one 7 inch diamond blade and an appropriate drain station. The saw itself should be on a stable surface that is free from vibrations. The area should also be well-ventilated to minimize inhalation of dust particles.
Prior to cutting, ensure that the saw is clear of dirt and debris, oil the guide rollers and place the included guard into position. If adjusting the angle of the blade or height of cutting table, use a leveler to ensure accuracy.
Create a cutting line on your tile with a felt tip marker or grease pencil and then make sure you check various angles before turning your saw on. It is important that you confirm all angles before beginning to cut as most mistakes occur in this setup process. When ready, turn on your wet tile saw and using light pressure begin to cut along your marked line.
Cutting Tile with a 7 Inch Wet Tile Saw Blade
The proper technique for cutting tile depends on the thickness and hardness of the material you’re cutting. However, regardless of the type of tile, there are a few key points to consider when using a 7 inch wet tile saw blade.
Firstly, ensure your saw blade is in good condition and securely fastened to the saw. Then, you will want to mark your cut lines on the face of the tile, starting from either side and connecting in the middle if possible. Take extreme caution when making these marks as any deviation from straight and/or level can lead to an unsightly finish or worse – an uneven cut. Once satisfied with your lines, organize and secure the tiles onto some form of cutting surface like plywood on top of an elevated area so that it’s easy for cutting.
When ready to begin cutting your tile, match up the blade with one side of your marked cut line. Positioning carefully is essential here as the goal is to make smooth contact with all areas of cut line while ensuring balance in order to avoid over-cutting or chipping away too much material. To start things off correctly and get full utilization out of your blade, move slowly while it is engaged in contact with your material but eventually begin moving faster at a moderate pace once sure that there won’t be any irregularities or kickback. Be careful not to go too fast as this increases heat buildup in both saw blade and moldings which can potentially cause warping; this could leave excess standing material or again, an uneven finish upon completion.
Closely monitor throughout – Pausing once per inch should be sufficient – before starting a slow finish until reaching completion; You should have a clean break afterwards so at this point you may use extra assistance from either hammer or mallet if necessary although this should be avoided whenever possible due to potential recessed damage involved with force application over delicate ceramic materials like marble or glass tiles.
Preparing the tile for cutting
Before cutting tile with your wet tile saw, it’s important to make sure you have the right tools and materials on hand. You will need a 7-inch wet tile saw blade, a wet tile saw, safety glasses and hearing protection, a measuring tape and square or level, an angle grinder (if cutting curved lines or shapes), a marker and pencil. Additionally, for outdoor projects, you may need to buy waterproof sealant and concrete adhesive.
Once you have your tools prepared it’s time to start measuring your tiles. Using the measuring tape and square ruler or level determine the size of the tile pieces you will need for each section of the project. Once all measurements have been taken, use the marker and pencil to draw guidelines onto each tile piece before cutting. For best results use painter’s tape at this stage to keep the markings from rubbing off during cutting.
Finally if you are planning on making curved cuts or shapes in any of your tiles now is the time to set up an angle grinder. Putting safety first is fundamental so always make sure both glasses and hearing protection are worn when operating any power tool such as an angle grinder or wet tile saw!
Setting up the blade
Once you have chosen the appropriate blade for your tile and made certain that your saw is clean, secure and properly lubricated, you are ready to set up the blade. Due to stability concerns, a 7 inch wet tile saw blade is best mounted onto a device that offers a level platform to work from. The guard must be in place and secured before the blade is installed, so make sure it’s properly attached. When mounting and tightening the blade, evenly distribute pressure between all of the mounting bolts with a torque wrench to ensure proper clamping pressure. You should use this same procedure when changing out blades in the future as well.
Before operating your wet tile saw with a 7 inch blade, make sure you adjust the angle of attack on the table so that there is an appropriate angle of approach for each cut. After setting up your machine correctly with an appropriate angle for cutting and leveling your saw’s base correctly on whatever surface it’s resting on (to ensure accuracy), you are now ready to start cutting!
Remember to wear eye protection while operating any power tool or anything else that could possibly cause small particles or debris to get airborne while sharp objects are being used.
Finishing the job
Once your tile is cut and placed, you will need to finish the job. The most important step in this stage is to make sure that all of the grout lines are even and filled. If this step is not done correctly, you may end up with crooked lines in your tile.
Once you have checked all of the grout lines, it is time to wipe down any excess grout that has dried onto the face of the tiles. This should be done with a damp cloth, taking care not to remove any color from your tiles. Then, apply a sealant to help protect your tiles from dirt and damage.
Finally, make sure that all of your joints are cleanly sealed with caulking or silicone for a neat finish. Apply enough so there are no gaps but not so much that it squishes out onto the surface of the tile or grout line and ruins its look. Once it is dry and set, you will have completed cutting tile with a 7 inch wet tile saw blade!
Cleaning up the work area
Before beginning any project involving a wet tile saw blade it is important to create a clean and safe work environment. This should include:
- Wiping down the entire surface with a damp cloth or vacuum to remove all dust, dirt, and debris.
- Ensuring the area is well-ventilated and wearing protection such as safety glasses or face masks if working with glue or adhesives.
- Setting up any temporary support structures on either side of where the cut will be made in order to keep the blade stable and reduce potential kickback while cutting.
- Setting up appropriate lighting or Magnifying glass to inspect your work throughout the tile-cutting process and ensure accurate cuts are made every time.
- Organizing your materials and tools so that they are in close reach when needed during a project; this includes having nearby cutting oils, spare blades, towels and other accessories that could come in handy during your tile-cutting process.
Storing tools and materials
Before beginning a tiling project, it is important to ensure you have all the necessary tools and materials needed. Once these are assembled and ready to use, the next step is safe storage. Storing tools and materials properly will protect them from moisture damage, reduce the risk of injury, and make sure they are readily available when needed.
Tools should be stored in a dry location off the ground away from pieces of tile that may break or chip. For wet saws, make sure that any dampness has been dried off after each use and that blades are stored with protective covers on them. Blades can be damaged if stored next to other metals such as screws or nails due to potential corrosion from coming into contact with air-borne moisture. A good practice for keeping your saw in top condition is wiping it down with an oiled cloth after each use.
Materials for cutting tile should also be stored safely to prevent damage or decay of surfaces during construction projects and normal wear and tear during home remodeling projects such as replacing grout or re-sealing old joints between tiles. For materials such as backer board or thin set, store them in a cool dry place away from excessive moisture which can increase levels of mold growth when exposed to water over time; rubber gloves are also recommended when handling these products due to their porous nature making them prone to cracking over time as well as increasing your risk of skin irritation upon contact.
Maintenance and Care of a 7-inch Wet Tile Saw Blade
It is important to take proper care and maintenance of your 7-inch wet tile saw blade in order to maximize its lifespan and performance. It is important to inspect the blade for any damage, dirt, or debris buildup before each use. The blade should be periodically sharpened for maximum performance. Any stones can be removed from the cutting area with a stiff brush if necessary. In order for the blade to stay cooler, it is important to check your water levels before each cut and add more if needed.
It is also important to store your wet tile saw blade correctly after use. It should be properly dried off before being stored in a secure location; a dry rag can used when drying off the blade. You should also take some time to apply a thin coat of lubricant on both sides of the saw periodically, as this will help keep it rust-free over time. Lastly, make sure that you always store your 7-inch wet tile saw blades in a cool dry location away from direct sunlight or extreme temperatures, as these conditions have an effect on their functionality and longevity.
Cleaning the blade
When starting any tile cutting project, it is important to make sure that the saw blade is clean and free of debris. Corrosion or rust on the blade will reduce its efficiency and lead to poor results. First, check the blade for physical damage and make sure that there are no sharp edges or burrs. Use compressed air to blow off any remaining particles, then rinse the blade thoroughly with soap and water.
Once it is clean, inspect it again for chips or broken teeth before using to make sure that it is ready for the job. Allow the saw blade to dry completely before beginning your tile cutting project.
Maintaining the saw
Maintaining your wet tile saw is essential to ensuring it lasts for many years and functions properly. A few ways you can maintain the saw blade include cleaning the saw, changing out the water often, and adding lubrication.
Clean the Tile Saw-: Clean both sides of the saw blade regularly with a brush or cloth to remove any dirt or debris that may be on it. When cleaning the blade be sure to follow the manufacturer’s instructions in order to ensure proper use of their product. Make sure you clean all parts of the tile saw; this includes inside and underneath blades, along with any other parts that may have come in contact with uncut tile material.
Change Out Water –: Make sure you’re using fresh, clean water for cutting tiles on your wet tile saw. Refill or replace any water that has become dirty or clouded from bits of grout or other particles from previous cuts. This will ensure a clean cut each time and will help prevent clogging of small pieces getting caught between gears and motors, potentially damaging your machine.
Add Lubrication-: Be sure to add lubrication to your blades according to manufacturer’s instructions; this will keep them running smoothly and efficiently and reduce wear on them over time. With certain blades, lubing up can make it last twice as long as it would without being lubed up! And don’t forget about lubricating moving parts such as bearings every three months or so; this will help them move smoothly so they won’t get stuck while cutting as well as decreasing wear over time.
:max_bytes(150000):strip_icc()/cutting-tile-with-a-wet-saw-182459158-5882b46e3df78c2ccd51e099.jpg)
Conclusion
At the end of the day, the best way to cut tile is by using a wet tile saw. A wet tile saw is a specialized tool that uses a diamond-tipped blade to make clean, accurate cuts in ceramic and porcelain tiles. A 7 inch wet tile saw blade is an ideal size for cutting most standard tiles, providing a large enough cutting surface to safely cut even large pieces of ceramic or porcelain tile.
When cutting with this type of blade, it’s important to make sure you are wearing proper safety equipment and that you have read and follow all instructions provided by the manufacturer. It is also important to maintain a steady hand and use even pressure when cutting tiles with this type of tool. With proper preparation, the 7 inch wet tile saw blade can easily deliver beautiful results for any project.
FAQ’s
How big of a tile can a 7 inch tile saw cut?
A 7 inch tile saw can typically cut tiles up to 12 inches in size, diagonally.
How do you use a 7 wet tile saw?
To use a 7 wet tile saw, you need to fill the reservoir with water, align the tile with the blade, and push the tile through the saw blade while holding it steady.
How thick of tile can a wet saw cut?
A wet saw can cut tiles of various thicknesses, depending on the saw’s blade and motor power. Generally, a wet saw can cut tiles up to 2 inches thick.
How do you cut large tiles with a wet saw?
To cut large tiles with a wet saw, you need to first measure and mark the tile, then use a straight edge to guide the tile through the saw blade, making sure to support the tile’s weight.
How do you cut a 7 inch hole in tile?
To cut a 7 inch hole in tile, you can use a diamond hole saw attachment with your wet saw. You’ll need to mark the center of the hole and use the attachment to cut through the tile.
How do you cut very large tiles?
To cut very large tiles, you can use a large format tile saw, which is designed for cutting oversized tiles. You can also use a manual tile cutter or a tile nipper for smaller cuts.
What is the best blade to cut ceramic tile?
The best blade to cut ceramic tile is a diamond blade. However, there are different types of diamond blades available, such as continuous rim, segmented rim, and turbo rim blades, each suited for different types of cuts.
How do I choose a wet tile saw?
To choose a wet tile saw, you need to consider factors such as the saw’s blade size, motor power, water delivery system, cutting capacity, and additional features such as bevel cuts and miter cuts. You should also consider your budget and the types of projects you’ll be using the saw for.
How do professionals cut tile?
Professionals may use various tools to cut tile, including wet saws, manual tile cutters, tile nippers, angle grinders, and tile hole saws. They also typically use safety equipment such as gloves and eye protection.
Can you cut tile with a wet saw?
Yes, a wet saw is commonly used for cutting tiles. In fact, it’s one of the most common tools used for cutting ceramic, porcelain, and stone tiles. A wet saw uses a diamond blade to make precise cuts in the tile while keeping the blade cool with water, which helps to reduce friction and prevent the blade from overheating. The water also helps to reduce dust and debris, making it a cleaner option than other cutting tools. Wet saws can be rented or purchased from home improvement or tool rental stores, and they come in a range of sizes and power levels to suit different cutting needs. It’s important to use the appropriate safety gear and follow the manufacturer’s instructions when using a wet saw.
See Also:
- Best 12 sliding compound miter saw blade
- Best 12 inch miter saw blade
- Best 10 inch table saw blade
- Best 8 1/4 table saw blade
- Best 7 inch wet tile saw blade